Getting started with our Google Ads platform? Or maybe you’re just curious as to how to navigate through setting up your account information. We’ve got you covered with this support guide to complete your account setup with Google.
Bear in mind before you begin, you will need to connect your Google Ad account with Metigy prior, to following these steps. If you haven’t already, go ahead and create your account profile. Don’t worry, we’ll wait here until you’re ready.
Get started with Metigy’s Google Ads solution.
Complete your payment set-up to start growing your business

Table of Contents
ToggleTo summarise, Google Ads makes it easier for you to reach customers searching for what your business offers. What you offer, where can they go to find you, what can they buy are all types of searches that your customers may be looking for. You’re able to pay only for results when people take action like clicking your ad to visit your website, or stay stricter with an advertising budget cap. To be able to start getting the results that matter to you, you’ll need to finish your billing set-up.
Google essentially has tried to design this billing set-up journey to be convenient for you. You will be able to decide how much you want to pay depending on your budget, how you pay, and create the ad campaigns that suit your objectives. Think of it as your one-stop shop for managing all your advertising costs, as well as:
- Summary of past transactions
- Payment methods
- Payment profile
At Metigy HQ, we understand it can be daunting to learn a new tool. This is why Metigy has partnered with Google to offer you an easy, integrated approach to delivering your Google Ad solutions. You will be able to create and manage your ads the way you want, supported by Metigy’s Live Recommendations, all in one place. Sounds exciting right?
Great, let’s continue setting up your Google Ads Account so you can start launching your Ads!
Previously…
You should have gone ahead and connected the relevant Google Ad accounts to your profile. For this part, you will need an active email address, and have set the timezone and currency in which you would like to be charged.
Step 1: Accept the invitation from Google
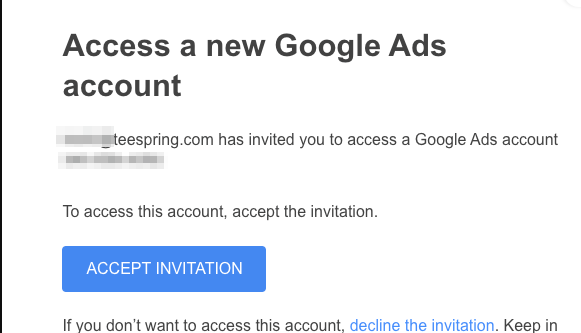
After you have completed the setup creation of your new Google Ad account, you will receive an email invitation from Google Ads. In order to start accessing your business account, please click ‘Accept Invitation’. From here, this will lead you to a Welcome message to which you ‘Continue’ to confirm the invitation into the Google Ad account.
Step 2: Go to Tools & Settings, and open ‘Billing Settings

You’re in! Google Ads introduces you to an Account Overview page. This “All Campaigns” page is the first place you land when you open your Google Ads account and lets you review your performance at a glance.
Navigating over to the top toolbar, you will see icons related to different functions: Search, Reports, and Tools & Settings.
- In the top right corner, click ‘Tools & Settings’
- Click ‘Billing settings’ under the Billing sub-category
Step 3: Update your Payment information
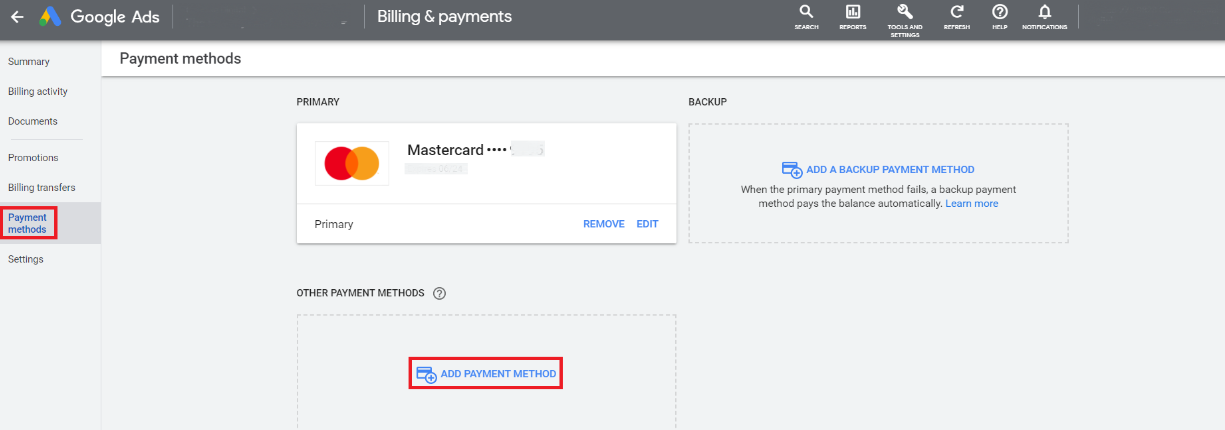 When setting up your billing details, it’s good practice to keep in mind your payment settings on how you pay and your payment method.
Choose how you pay
Select the Billing Country and Currency for how you wish your purchases to be charged. This ultimately determines how you make your payments – which are charged automatically.
- Automatic payments are automatically charged to your selected credit card after your ads run (30 days after your last charge or when you reach your payment threshold). Learn more about your billing options.
Choose what you pay with
Depending on the Billing Country you choose, your choices for payment methods may vary. For accounts in Australia, your payment methods include:
- Credit or debit card
- Money Transfer
- Monday transfer using BPAY
- Monthly invoicing
- PayPal
Update the payments profile you would like to link to this payment account and follow the prompts to fill in the rest of your account details including your account type, business name, card details and zip code.
Step 4: Review your Payment information

Before submitting, ensure your payment profile is correct and up to date. Note, that you can always go back in and edit to make changes to any field in the future. When everything is complete, click ‘Submit’ to save your billing settings.
Step 5: Kickstart your Google Ads journey
You’re all done! What does this mean? Well for starters, your Billing and Payments are now updated and active. Whenever you return to this summary page, you will be able to see a snapshot of your payment balance, past transactions, and other setting details.
Start your Ad launch!
Whilst the ball is still rolling, head back to Metigy’s ad platform to finish the verification process. You are now free to explore the possibilities of adding Google Search Ads or Google Display Ads to your marketing channel mix. Find out more on how to create your first Google Display Ad or Google Search Ad post, and start connecting your brand with more customers!
