Before we get started building your Google Ads with Metigy, it’s important to remember that Metigy Ads allows you to build your campaign in a non-linear way. This means you can build the whole campaign from end to end all at once, or you can take your time completing each step in parts and come back to it. For instance, you might know the targeting and investment you’re looking to make, but haven’t sorted your creatives yet. You can come back to it later. At any time you can choose to close the ads creator. Simply use the close button at the top right of the screen. Your ad will be saved in the ads manager for you to pick up another time. Let’s get started…
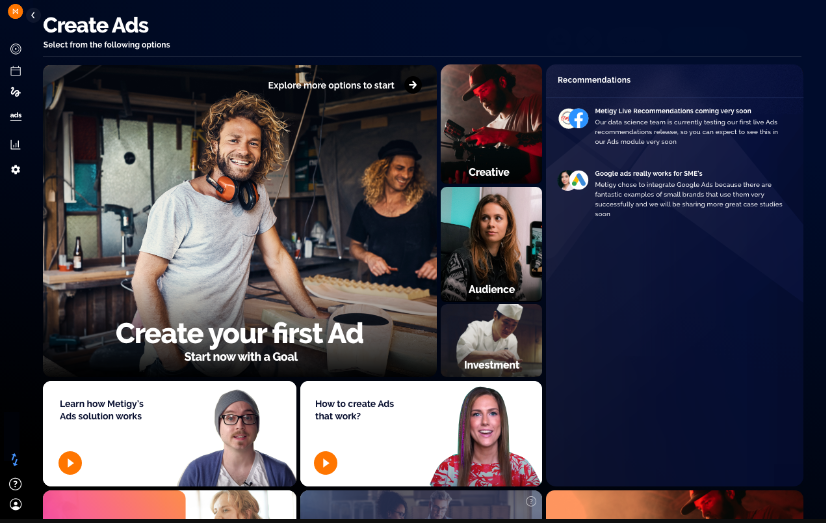
Starting from the command center, head to the control panel on the left-hand side and scroll to Ads. Here you’ll find two options – ads manager and ads creator. Ads Manager allows you to see the status of your ads, both previous and current. Ads creator is where you can build a new ad campaign at your own pace. To start a new campaign select ads creator. Click on Create your first ad.
#1 Setting your goals
Select your connected Google Ads account underneath Platform & Goals.
Table of Contents
Toggle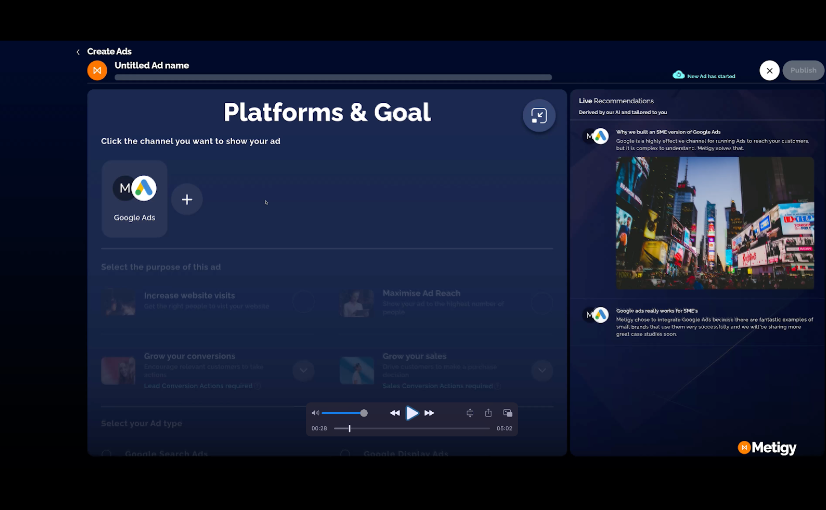
This will open a list of goals that you can choose from. You can use your ads to:
- Increase website visits Get the right people to visit your website
- Maximise ad reach Show your ad to the highest number of people
- Grow your conversions Encourage customers to take actions
- Grow your sales Drive customers to make a purchase decision
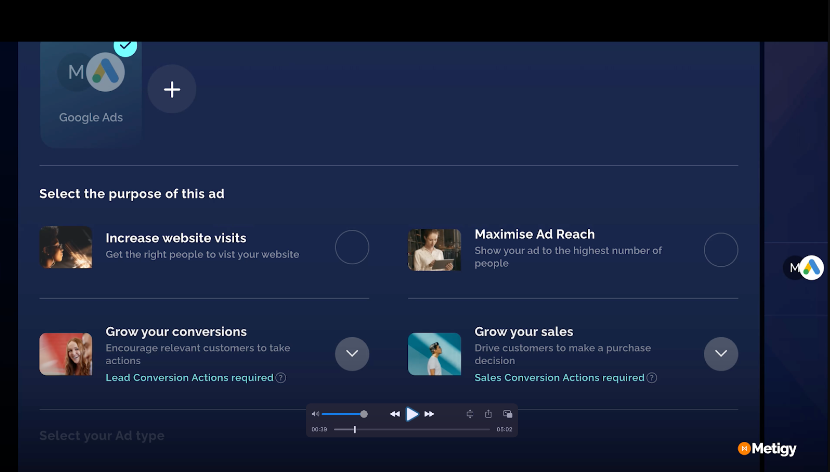
Now select the ad type from the two options – search or display. Search will run keyword ads in Google search results. Display will run creative ads across the Google Display Network. Click on confirm when you’ve made your choice.
#2 Choosing your investment
You can now choose your campaign parameters for investment, creatives, and the audiences and keywords you would like to target. Name your ad campaign in the top right corner, clicking on the pencil to edit this. Now let’s choose your investment. You can choose to spend daily budgets or a total budget.
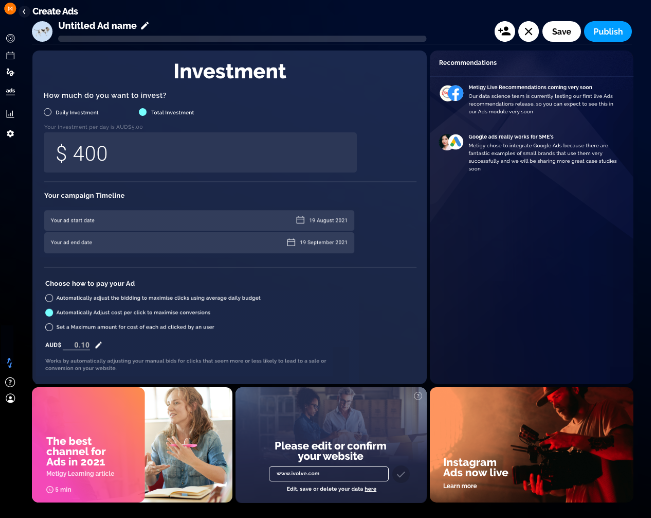
Choose your start date. Add an end date – keeping this open will give you flexibility to keep the campaign going and you can then pause it later. Click on confirm when you’ve set your budget.
#3 Defining your keywords and audience
Now let’s choose your keywords and targeting. You can type the locations you want to target and excluding locations will ensure you don’t waste spend serving ads to the wrong locations. Choose the demographics of your audience such as gender, age, parental status, household income etc.
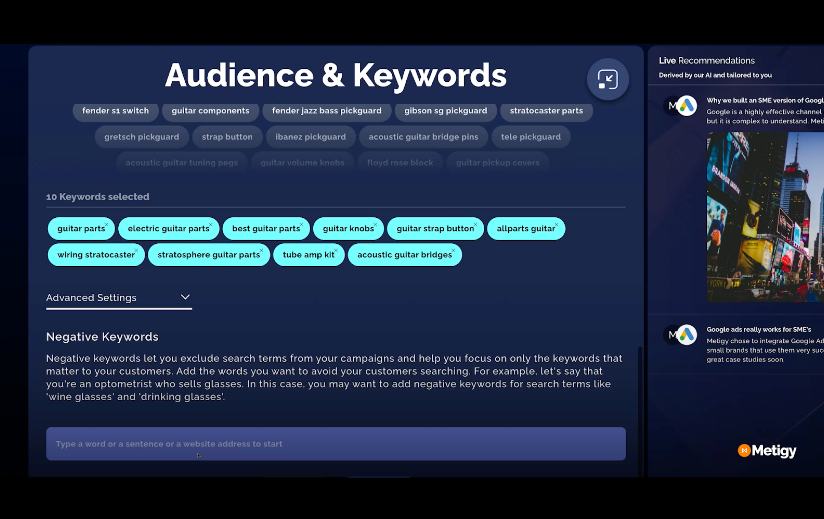
All options are pre-selected so click on the ones you want to remove. The demographics that remain in light blue are the options you have chosen. Select the language that your ads will appear in and target such as English. Now enter your keywords by starting with a product, service or phrase that is relevant to your business like ‘guitar parts’ and then click to choose at least 10 keywords for your ad. By hovering over each suggestion, you’ll see the estimated number of people this could reach.
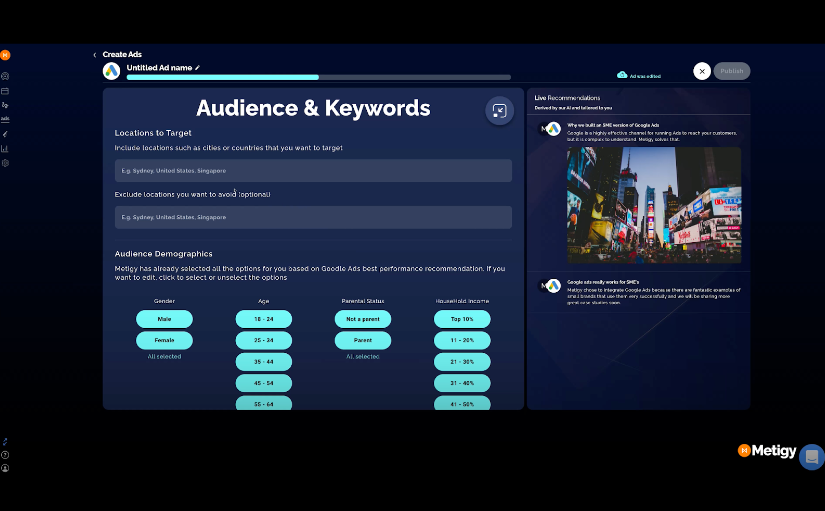
Select any negative keywords you don’t want to be included in your campaign. For example, if you sell reading glasses you can exclude irrelevant keywords such as wine glasses or drinking glasses. Click on confirm when you’re comfortable with your keyword selection.
#4 Previewing your creative
Let’s get creative and start to take a look at how your ad will appear on Google. Your ad will have headlines, descriptions, and a final URL destination such as your website or a product page on your website. If you’re creating a display ad, it’ll also feature an image or video plus your brand logo. We know that Google likes ads that have a few options and we would advise: For search ads at least 5 headlines, noting that our minimum is set to 3 and the maximum is 15. For display ads at least 3 headlines, noting that our minimum is set to 1 and the maximum is 5.
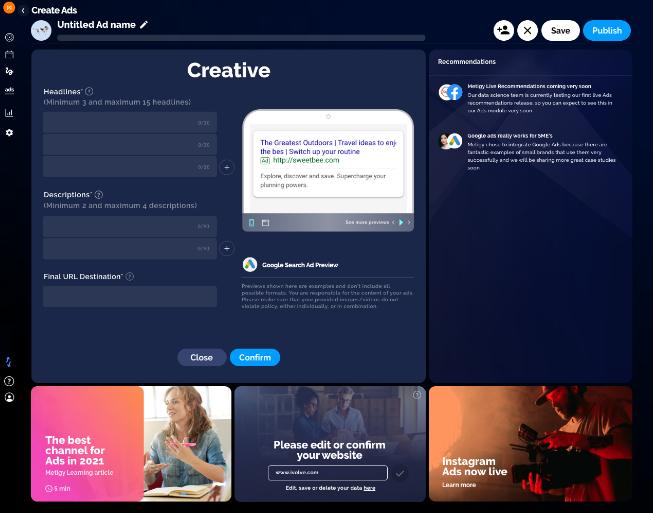 Search ad creative screen
 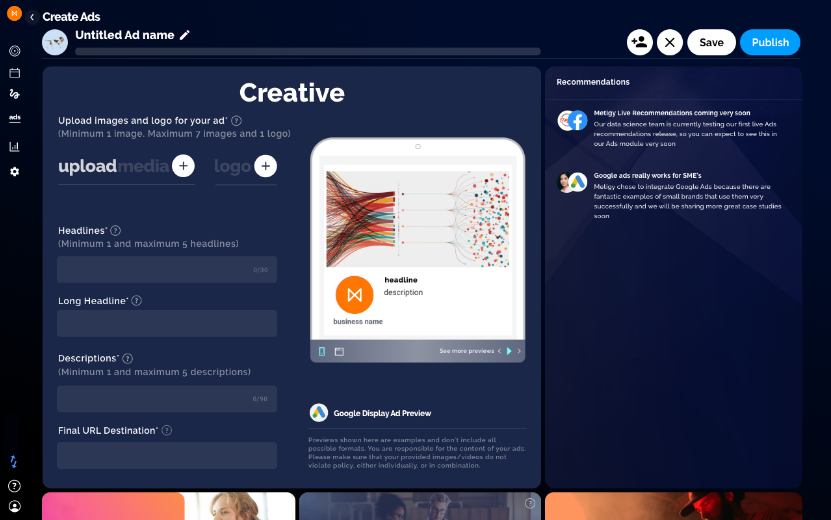 Display ad creative screen
Start to complete the headline fields using the character count to know how much space you have left for each one. Once you’ve completed the minimum number of headlines a plus button will appear and you can add more fields. Your headlines will populate on the right-hand side preview as you type and you’ll see separators between each headline. This is what your ad will look like in Google Follow the same process for the descriptions. We recommend a maximum of 4 descriptions because Google will optimize your creatives to the ones that are working best. Add your campaign images or a video if you’re creating a display ad. Finally, add your destination URL. If there is ever an issue with your campaign a warning will appear in the top left-hand corner. You’re now ready to publish your ad. Remember, you can edit any of the four steps we went through by hovering over the green tick and clicking on the pencil when it appears. Click publish in the top right corner.
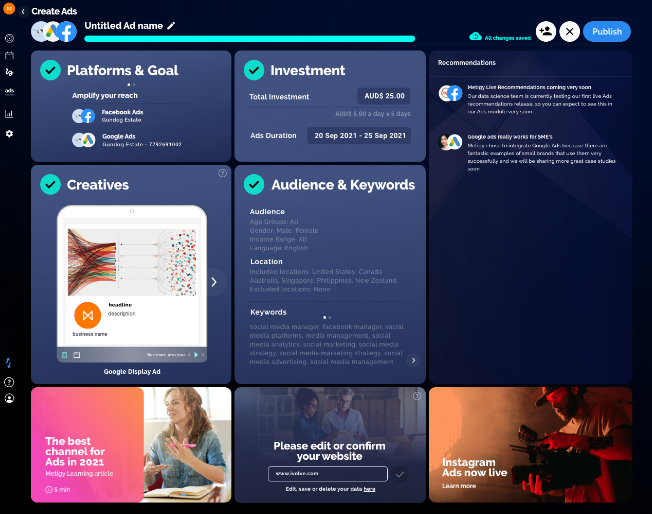
What happens after publish?
Great question! If you’re happy with your campaign setup, it’ll be reviewed by Google to make sure it is compliant with its policies – this includes your headlines, descriptions, keywords, URL destination, and images/videos. Click ‘OK’ for these to be reviewed. This typically takes 24 hours. Remember to visit your ads manager to keep track of your Google ad campaigns and use ads creator to build more campaigns with confidence. If you have any questions or need help with your Google Ads, please feel free to reach out to us via email or via online chat in our app.
